Spring Boot入门
一、简介与安装
1、简介
使用 Spring Boot 可以轻松地创建独立运行的、生产级的基于 Spring 的应用程序;而且大多数 Spring Boot 应用程序只需要很少的 Spring 配置。
2、安装
- 系统需要
Spring Boot2.2.2版本需要Java8、Spring Framework 5.2.2.RELEASE或以上版本。(可以使用java -version查看已安装的Java版本)
Spring Boot支持嵌入以下的Servlet容器:Tomcat 9.0(Servlet4.0)、Jetty 9.4(Servlet3.1)、Undertow 2.0(Servlet4.0)。
- 安装
此处以Maven方式安装:(Spring Boot 兼容 Apache Maven 3.3及更高版本,可使用mvn -v命令查看Maven版本)
Spring Boot依赖groupId:org.springframework.Boot;通常,在Maven POM文件中需继承自spring-boot-starter-parent项目,并声明对一个或多个”Starter”的依赖关系;Spring Boot还提供了一个可选的 Maven 插件来创建可执行的jar文件。
pom.xml文件部分:
<!-- Inherit defaults from Spring Boot -->
<parent>
	<groupId>org.springframework.boot</groupId>
	<artifactId>spring-boot-starter-parent</artifactId>
	<version>2.2.2.RELEASE</version>
</parent>

<!-- Add typical dependencies for a web application -->
<dependencies>
	<dependency>
		<groupId>org.springframework.boot</groupId>
		<artifactId>spring-boot-starter-web</artifactId>
	</dependency>
</dependencies>

<!-- Package as an executable jar -->
<build>
	<plugins>
		<plugin>
			<groupId>org.springframework.boot</groupId>
			<artifactId>spring-boot-maven-plugin</artifactId>
		</plugin>
	</plugins>
</build>
执行Maven命令:
在pom.xml文件上右击,选择Run As – Maven Build...,在弹出框中输入Goals即可(例如:使用dependency:tree命令打印项目依赖项的树表示形式)。
(可以点击https://spring.io/tools/下载Spring Tools。)
二、Hello World
1、创建POM文件
新建Maven工程,修改pom.xml文件,添加必要的依赖项:
<project xmlns="http://maven.apache.org/POM/4.0.0"
	xmlns:xsi="http://www.w3.org/2001/XMLSchema-instance"
	xsi:schemaLocation="http://maven.apache.org/POM/4.0.0 http://maven.apache.org/xsd/maven-4.0.0.xsd">
	<modelVersion>4.0.0</modelVersion>

	<groupId>com.study.spring</groupId>
	<artifactId>app</artifactId>
	<version>0.0.1-SNAPSHOT</version>
	<packaging>jar</packaging>

	<name>app</name>
	<url>http://maven.apache.org</url>

	<properties>
		<project.build.sourceEncoding>UTF-8</project.build.sourceEncoding>
	</properties>

	<!-- Inherit defaults from Spring Boot -->
	<parent>
		<groupId>org.springframework.boot</groupId>
		<artifactId>spring-boot-starter-parent</artifactId>
		<version>2.2.2.RELEASE</version>
	</parent>

	<!-- Add typical dependencies for a web application -->
	<dependencies>
		<dependency>
			<groupId>org.springframework.boot</groupId>
			<artifactId>spring-boot-starter-web</artifactId>
		</dependency>
	</dependencies>
</project>
2、编写代码
App.java:
package com.study.spring.app;

import org.springframework.boot.SpringApplication;
import org.springframework.boot.autoconfigure.EnableAutoConfiguration;
import org.springframework.web.bind.annotation.RequestMapping;
import org.springframework.web.bind.annotation.RestController;

/**
 * Hello world!
 *
 */
@RestController
@EnableAutoConfiguration
public class App {

	@RequestMapping("/")
	private String home() {
		return "Hello World!";
	}

	public static void main(String[] args) {
		SpringApplication.run(App.class, args);
	}
}
说明:
@RestController
此注解可以标识某个类为Web Controller,Spring在处理传入的Web请求时会考虑它。
@RequestMapping
此注解提供”路由”信息;上面的例子表示任何带有/路径的HTTP请求都会映射到home()方法。
@EnableAutoConfiguration
此注解表示告诉Spring Boot根据添加的Jar依赖来自动配置应用程序,例如:因为spring-boot-starter-web添加了Tomcat和Spring MVC,因此该注解会推测正在开发Web应用程序并相应的自动设置Spring。
SpringApplication
App类的main方法通过SpringApplication的run方法来启动应用程序、启动Spring、启动自动配置的Tomcat Web服务器。同时,需要将App.class作为参数传递给run方法,来告诉SpringApplication哪个是主要的Spring组件。
3、运行
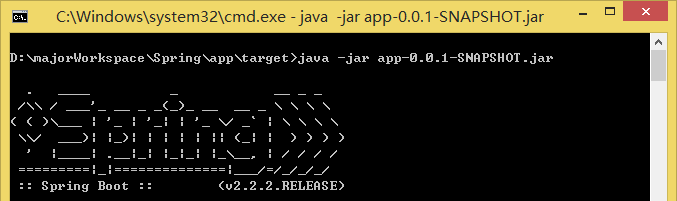
运行之后会在控制台打印Spring标识,并在日志中输出Tomcat端口等信息:
  .   ____          _            __ _ _
 /\\ / ___'_ __ _ _(_)_ __  __ _ \ \ \ \
( ( )\___ | '_ | '_| | '_ \/ _` | \ \ \ \
 \\/  ___)| |_)| | | | | || (_| |  ) ) ) )
  '  |____| .__|_| |_|_| |_\__, | / / / /
 =========|_|==============|___/=/_/_/_/
 :: Spring Boot ::        (v2.2.2.RELEASE)
访问:http://localhost:8080/即可看到 Hello World!。
4、打包
- 使用
mvn package命令打包
命令配置:

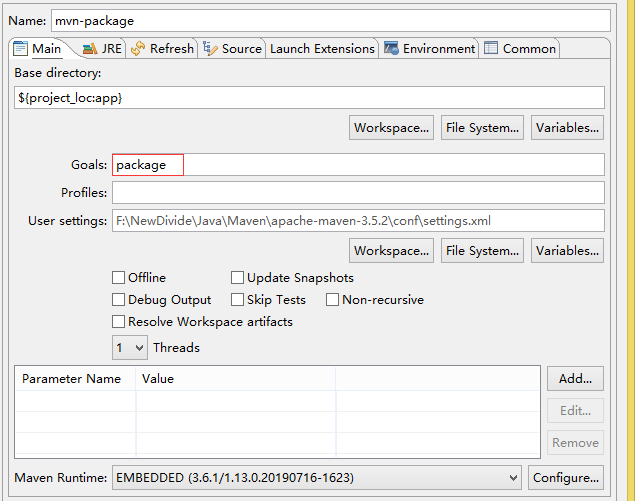
可以通过在pom.xml文件上右键 Run As – Run Configurations... – Maven Build下查看已配置的命令。
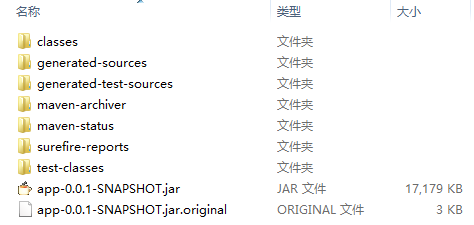
点击Run按钮即可运行命令,成功运行完package命令后,在项目的target目录下会看到生成的app-0.0.1-SNAPSHOT.jar文件;app-0.0.1-SNAPSHOT.jar.original文件为Spring Boot打包前创建的原始Jar文件。
- 运行生成的Jar
使用java -jar命令运行此Jar文件来启动应用程序:
- 问题与解决方法
运行此命令时报错:
[ERROR] Failed to execute goal org.apache.maven.plugins:maven-compiler-plugin:3.8.1:compile (default-compile) on project app: Compilation failure
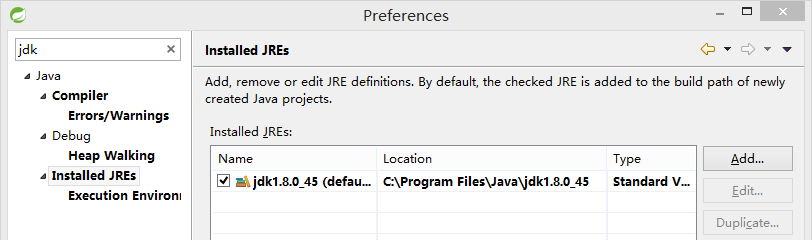
[ERROR] No compiler is provided in this environment. Perhaps you are running on a JRE rather than a JDK?
查看JRE配置,目前是配置的JRE目录:
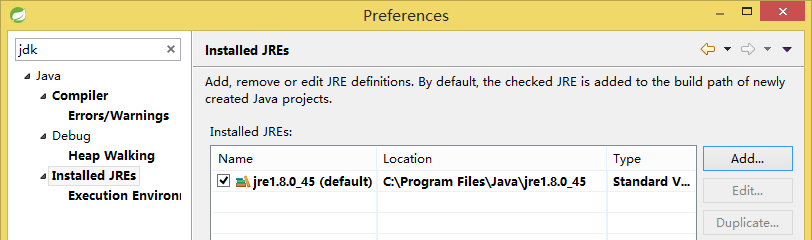
修改配置为JDK目录: